


You can get braces at any age. Straight teeth can help you to improve your confidence.
- Increase your self-confidence
- Reduce gum and bone loss
- Prevent tooth decay and
- Prevent headaches and jaw problems.
This is particularly important if you are over 50 years old, as your teeth will have experienced natural wear and tears. Poor oral health can also be linked to other health issues such as stroke and heart disease.
Here are twenty tips that will help you prepare for this life-changing adventure!
Your First Braces Consultation


Tip #1: Think about the braces options
The type of braces that you choose depends on several factors.
- visibility,
- hygiene level
- Cost-effectiveness
- Length of treatment
You should learn about all the options available, weigh up the pros and cons and ask your dentist for advice based on the lifestyle you lead.
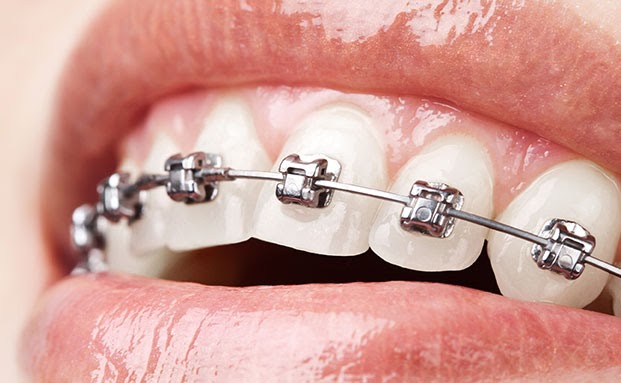
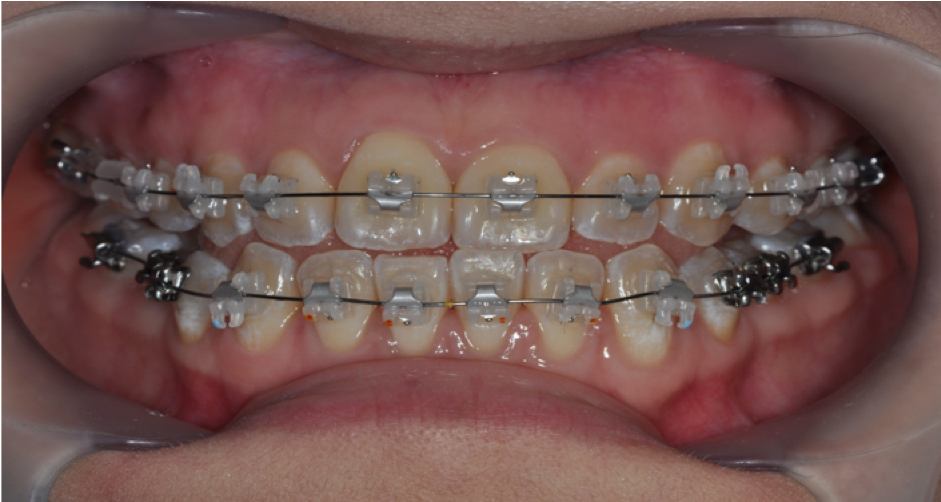
Traditional Metal Braces
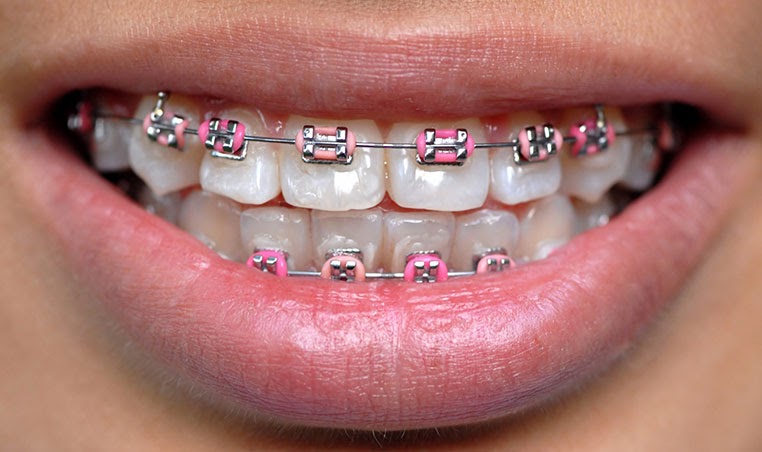

The most common and cost-effective treatment is metal braces. This treatment uses colored elastic modules and wires with metal brackets.
Traditional Ceramic Braces

Metal braces and traditional ceramic braces both use the same first generation technology. Only the color of the module is different. This is a great option if you want something less noticeable.
The downside is that they are easy to stain if you don’t take care of them.
Self-ligating Metal Braces

Self-ligating braces are made using a second generation technique – “sliding doors”. The brackets are held in place by the “sliding door” technique, which is a 2nd generation technology.
This version is more hygienic, but also costlier than traditional metal braces. It also requires less time for treatment.
Ceramic braces with self-ligating
Ceramic braces that self-ligate are a great way to combine ceramic braces with the benefits of the 1st generation of technology. It’s only disadvantage is that it costs more.
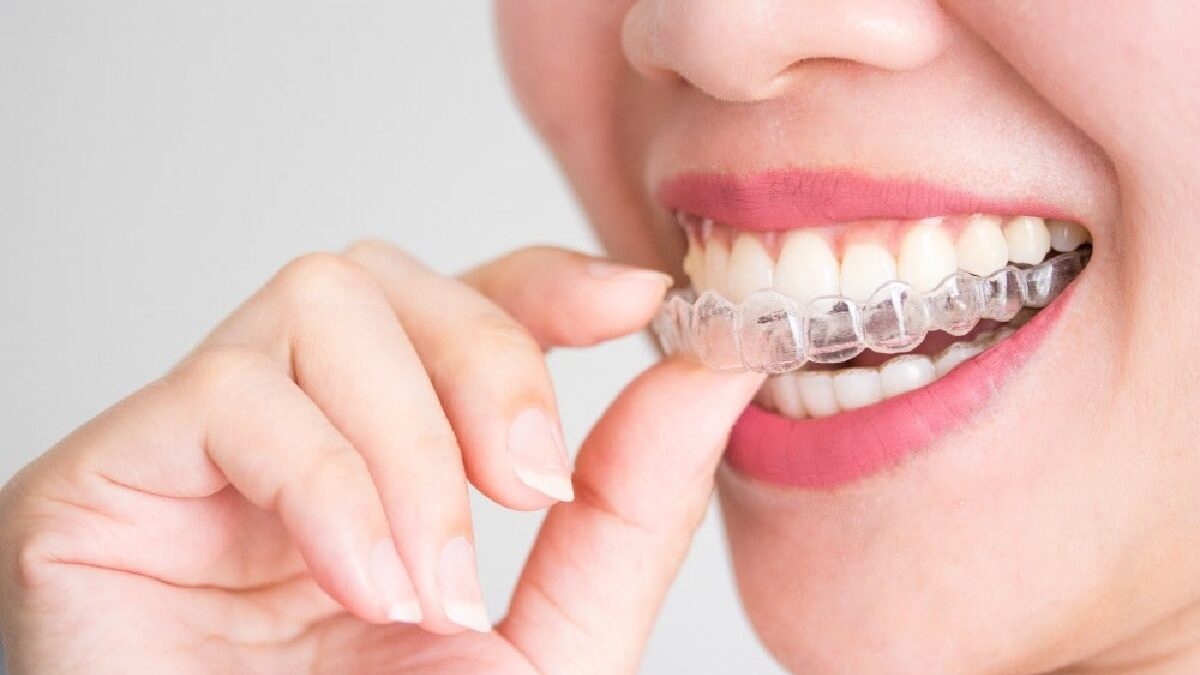
Invisalign
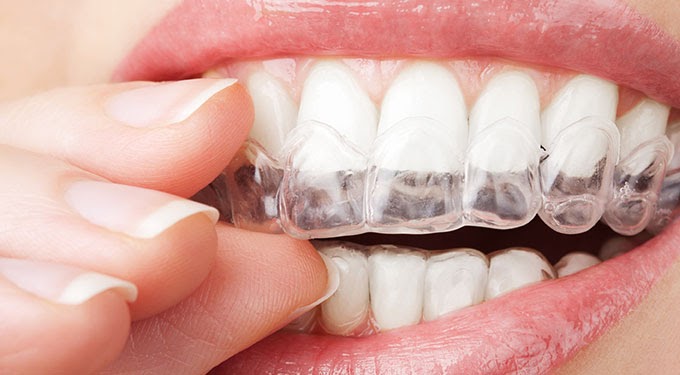

Invisalign are a set almost invisible plastic aligners. They provide a convenient and comfortable alternative. It is the most expensive option.
Tip #2: Check for payment plans
Braces can get expensive. Check with the clinic if their payment plans are flexible.
Tip #3: Clear your doubts by asking questions
What are some questions that you should ask?
- How is the treatment procedure?
- How often are follow-up appointments scheduled?
- How long is the treatment period?
- What if I have a tooth extraction?
- What if I have to get restorative work done before braces can be fitted?
You will have a better understanding of the experience.
Tip #4: Ask for advice from patients who have experience
You can also ask your dentist for the names of any staff members who had braces fitted at your age. Ask to speak to them and gain some insight. Speak to your friends and family.
After getting braces
Tip #5: Temporary Pain Relief Methods
You can expect some discomfort during the first week. You can use temporary pain relief techniques.
- Place a heating pad on your cheeks or a warm cloth
- Applying dental wax (provided to you by your dentist) to your braces will reduce friction.
Tip 6: Adopt a soft food diet
To reduce pain, it’s recommended to adopt a diet of soft foods.
You can find some healthy recipes for soft foods on the internet.
- Creamy Potato Soup
- Basic Asian Porridge
- Italian Risotto
Don’t forget to chop up your food into smaller pieces!
Tip #7: Avoid certain food and beverages
- Sticky and chewy food
They will easily get caught in your braces.
- Hard Foods
They will also loosen the brackets and cables.
- Dark-coloured drinks
If you have ceramic braces or Invisalign, this will stain them.
Prepare a cleaning kit for on-the-go
Prepare a small cleaning kit for travel. It should contain a toothbrush, dental floss and mouthwash.
It is important to floss and brush your teeth after each meal, especially if you have food stuck between the teeth.
Tip #9: Choose yourbraces colour
You can choose a different colour for each appointment if you have traditional metal braces. Choose colours like black or brown to avoid looking as if you have food stuck between your teeth.
Grey or silver o rings are the best. The clear ones look neutral, but they can stain easily depending on the food and drinks you consume.
Tightening Your Braces
Your braces will be tightened regularly to ensure your teeth are moved to their ideal position.
You may need to tighten your belt if you notice the following symptoms.
- Loose brackets
- You will not feel any pain or pressure on your gums or teeth when you eat harder foods
In some cases, power chains can be used to quickly move your teeth.
Tip 5 – 7 are also applicable at this stage, for at least several days if there is pain.
Before the appointment, avoid caffeine and sugary drinks and foods
Caffeine, sugar and their combination has the tendency to cause a heightened sensitivity.
- making you more panicky
- The dental anaesthetic will not work if it is blocked.
It is best to drink water.
Tip # 11: Take painkillers before your appointment
You can use painkillers to reduce any swelling and discomfort you feel. Ask your dentist whether it is okay to take painkillers before the appointment if you are nervous. It should be taken at least an hour prior to the appointment for maximum effect.
Continue taking your pill after the appointment. (Avoid chewable tablets! )
Tip: Check for any wires poking your skin after the procedure
Check if you are poked by any wires after the tightening. Your dentist can make the necessary adjustments, or supply dental wax to minimize any scraping.
Tip 14: Use dental wax to protect your teeth from being scraped by wires and brackets
Ask your dentist for dental wax. Apply it to your braces in the morning after brushing them and remove it at night.
Keep some dental wax with your travel cleaning kit to reapply as needed.
Tip 15: Use salt water to rinse your mouth
You can reduce pain by rinsing your mouth for one minute with salt water. This can be done with any mouthwash your dentist has recommended.
It will sting, but this is effective in speeding up healing.
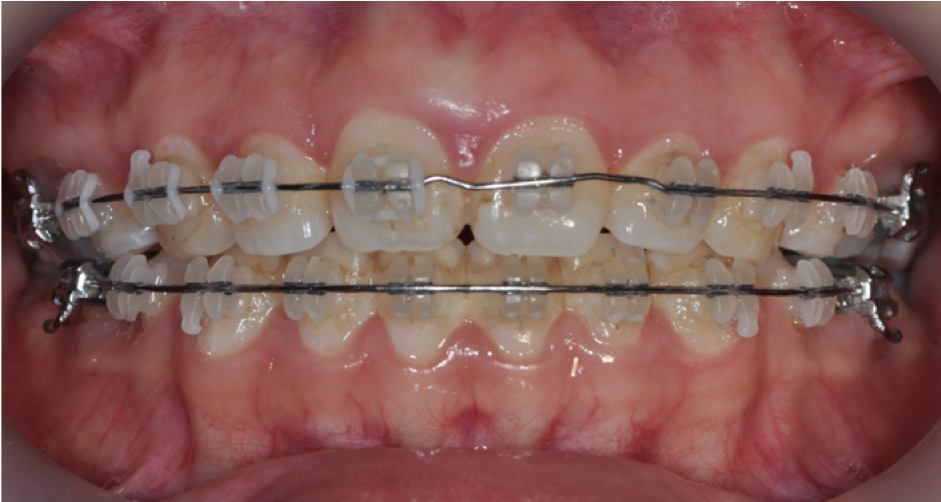
Rubber Bands for Braces
Rubber bands are the last step in your journey with braces! They are usually used to connect the brackets at the top and bottom.
Tip 16: Only remove rubber bands when necessary
Rubber bands should be placed in a disciplined manner.
Remove only before eating or brushing your teeth
Do not remove them if you have sore teeth. You will restart the adjustment period, and delay the completion of treatment.
Tip 16. Change rubber bands daily
Make sure that
- Change your rubber bands every day
- You should always swap both sides at the same time.
If one side snaps, then you will need to replace the other so that both sides are tight.
Tip #17: How to secure your rubber bands on your braces
You will need to look in a mirror. Place the rubber band on the brackets using your thumb and index fingers.
Tip #18: How to store rubber bands
Rubber bands come in small bags, so you need to keep them safe. Place them in a colored box in the bathroom cabinet and keep some in your cleaning kit.
After braces removal: Care of your teeth
The dentist will give you an approximate date when your braces can be removed.
The appointment will be made during the time of the meeting.
- The brackets will be squeezed and removed using pliers
- A special tool is used to remove any remaining residue (i.e. glue, cement) from your teeth
It is normal to feel pressure or hear cracking sounds.
A mould of your teeth is taken after which your retainer will be made.
Give your teeth time to heal
It’s recommended to wait a minimum of a month after the removal.
- Eating harder and crunchy foods
- Do not use any teeth-whitening treatment or other treatments that could cause sensitivity.
Tip 21: Wear retainers
You will receive a retainer, usually made of plastic. You will have to wear the retainer for 20-22 hours per day during the first 4 months. After brushing your teeth, you will have to wear the device continuously throughout the night.
Be sure to clean and store your retainers correctly. Replace them every two years if there are signs of discoloration or wear.
Tip 21: Schedule regular dental visits for follow-ups
You should make an appointment for a follow-up a few days after removing your braces. You’ll need to make annual appointments with your dentist so that he can examine your teeth and check your dental health.
FAQs about Braces for People Over 50
Can I do braces if I have a dental crown?
Dental crowns can be used to cover teeth which are damaged or decayed beyond repair. They also restore your smile.
It’s still feasible for you to wear braces with crowns. Only a different adhesive is used to attach brackets to crowns.
It’s better to wait until your braces are finished before getting a dental crown.
Do I need braces to correct my dental veneers?
Dental veneers can be made from porcelain or resin and are used to hide imperfections in your teeth.
As long as your veneer is in good condition , you can still get braces. The bracket will be attached to the adjacent teeth rather than the veneer.
You can also choose Invisalign.
Can I do braces if I have dental implants?
Dental implants attach to the jawbone to hold a crown or bridge in place. Braces cannot move the implant.
It is best to get a dental implants after braces, since there can be a space left for them.
If your teeth are overcrowded you can use braces to move your remaining teeth into the gap.


